Turning Steel Boxes into Dream Spaces: Your Complete Guide to Container Conversion
You’ve probably walked past a stack of steel shipping containers and thought, “What if I could turn one of those into a home, an office, or a pop‑up shop?” You’re not alone. Over the past decade, container conversion has exploded from a niche DIY hobby into a mainstream building method that blends sustainability, speed, and style.
In this post you’ll discover everything you need to know to move from a spark of inspiration to a finished, livable space—complete with cost tables, timelines, checklists, and a FAQ that tackles the most common doubts. Grab a notebook; you’ll want to refer back to this guide as you plan your own steel‑box makeover.
1. What Is Container Conversion?
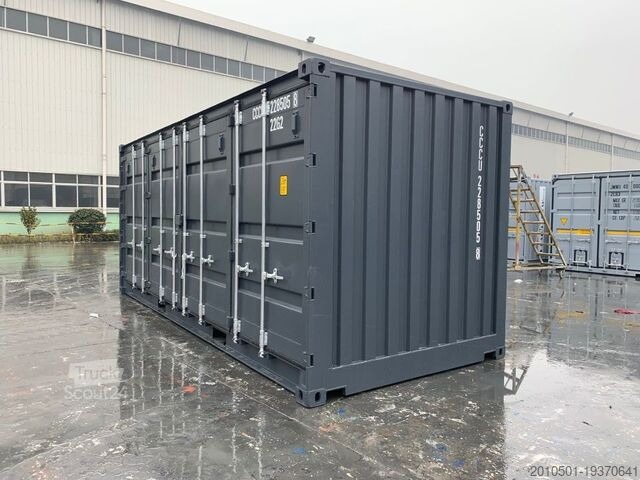
A container conversion (sometimes called a “shipping‑container build”) is the process of taking a standard intermodal freight container—most often a 20‑foot (6 m) or 40‑foot (12 m) unit—and transforming it into a functional structure. The container’s steel frame provides a sturdy, weather‑tight shell that you can cut, insulate, and finish just like any other building material.
| Container Size | Internal Dimensions (L × W × H) | Approx. Square Footage | Typical Uses |
|---|---|---|---|
| 20‑foot | 19.4 ft × 7.8 ft × 7.9 ft | 115 sq ft | Tiny homes, bathrooms, storage rooms |
| 40‑foot | 39.5 ft × 7.8 ft × 7.9 ft | 235 sq ft | Studios, offices, modular homes, pop‑up shops |
Because containers are built to withstand ocean‑borne loads, they already meet many structural requirements—meaning you can skip a lot of the heavy‑lifting that traditional construction demands. The key is how you adapt the rigid box to meet your comfort, aesthetic, and regulatory needs.
2. Why Convert a Container?
2.1 Speed
A basic container shell arrives on site ready to go. With proper planning, a typical conversion can be completed in 8‑12 weeks, compared with 6‑12 months for a conventional build.
2.2 Sustainability
- Recycled Material – You’re re‑using a steel product that would otherwise sit idle or be scrapped.
- Reduced Waste – The container’s steel frame eliminates the need for lumber, concrete, and many fasteners.
- Lower Carbon Footprint – Steel is highly recyclable, and the modular nature reduces transportation emissions.
2.3 Cost Efficiency
While high‑end finishes can drive up the price, a basic container conversion often costs 30‑50 % less than a comparable stick‑built structure. See the cost breakdown in Section 4 for details.
2.4 Design Flexibility
Stack, combine, or cut openings to create anything from a compact studio to a multi‑story loft. Because each container is a self‑contained unit, you can expand later by adding more boxes.
3. Key Steps in the Conversion Process
Below is a practical, step‑by‑step roadmap you can follow. Check each item off as you progress.
| Phase | Tasks | What You Need to Do |
|---|---|---|
| 1. Concept & Feasibility | • Define purpose (home, office, retail). • Check zoning and building codes. • Choose container size(s). | Research local regulations; contact the planning department. |
| 2. Budget & Financing | • Estimate total cost. • Secure financing or allocate savings. | Use the cost table in Section 4 as a template. |
| 3. Site Preparation | • Level ground, install foundations (concrete pads, piers, or a slab). • Arrange utilities (water, electricity, sewage). | Hire a site‑prep contractor if you’re not DIY‑ready. |
| 4. Structural Modifications | • Cut openings for doors, windows, and skylights. • Reinforce cut sections with steel brackets. | Work with a certified steel fabricator; obtain structural drawings. |
| 5. Insulation & Weatherproofing | • Choose insulation method (spray foam, batt, or rigid board). • Add vapor barriers and seal all seams. | Prioritize thermal performance to avoid condensation. |
| 6. Mechanical, Electrical, Plumbing (MEP) | • Install HVAC, wiring, lighting, and plumbing fixtures. • Ensure compliance with local codes. | Coordinate with licensed tradespeople. |
| 7. Interior Finishing | • Frame interior walls (if needed). • Install drywall, flooring, cabinetry, and fittings. | Select finishes that suit your style and budget. |
| 8. Exterior Treatment | • Apply rust‑inhibiting primer and paint. • Add cladding or decorative panels (optional). | Choose colors that match surrounding architecture. |
| 9. Final Inspection & Certification | • Schedule building‑department inspection. • Obtain Occupancy Permit. | Keep all documentation handy for future resale. |
| 10. Move‑In / Launch | • Furnish, decorate, or stock your new space. | Celebrate your achievement! |
4. How Much Does It Really Cost?
Below is a typical cost estimate for a 40‑foot container conversion, broken down by major categories. Prices are in U.S. dollars and assume a mid‑range finish. Adjust upward for luxury materials or downward for a spartan “shell‑only” build.
| Category | Estimated Cost | Notes |
|---|---|---|
| Container Purchase | $2,500 – $4,500 | New vs. used; includes delivery. |
| Foundation & Site Prep | $3,000 – $6,000 | Concrete pads or steel piers. |
| Structural Modifications | $2,500 – $5,000 | Cutting, welding, steel reinforcement. |
| Insulation & Vapor Barrier | $2,000 – $4,000 | Spray‑foam is pricier but most efficient. |
| MEP (Electrical, Plumbing, HVAC) | $6,000 – $12,000 | Depends on complexity (e.g., full kitchen). |
| Interior Finishes | $5,000 – $12,000 | Drywall, flooring, cabinetry, paint. |
| Exterior Treatment | $1,000 – $2,500 | Primer, paint, optional cladding. |
| Permits & Inspection Fees | $500 – $2,000 | Varies by jurisdiction. |
| Contingency (10‑15%) | $2,500 – $5,000 | Unexpected issues. |
| Total | $25,000 – $53,000 | Comparable to a 2‑bedroom conventional build ($45‑70k). |
Tip: Keep a detailed spreadsheet of all line items. Adding a small contingency early prevents budget shock later.
5. Timeline Snapshot – From Drop‑Off to Moving In
| Week | Milestone |
|---|---|
| 1–2 | Acquire container, secure permits, finalize design. |
| 3–4 | Site foundation work, delivery of container, initial structural cuts. |
| 5–6 | Insulation, waterproofing, and MEP rough‑ins. |
| 7 | Interior framing, drywall, and exterior paint. |
| 8 | Finish plumbing, electrical fixtures, HVAC, and interior trim. |
| 9 | Final inspections, punch list, and cleaning. |
| 10 | Move‑in or commercial launch. |
A realistic schedule includes buffer weeks for weather delays, material backorders, or unexpected code revisions.
6. Must‑Know Tips Before You Start
- Check Load‑Bearing Limits – Cutting large openings weakens the steel. Always have a structural engineer verify the design.
- Plan for Drainage – Steel can rust at the base if water pools. Install a slight slope on the floor and ensure proper guttering.
- Ventilation Is Critical – Even with good insulation, a sealed container can trap moisture. Include operable windows or a mechanical ventilation system.
- Invest in Quality Insulation – Spray‑foam provides both R‑value and an air‑seal, helping to avoid condensation and cold spots.
- Keep the Container’s “Box” Shape When Possible – The more you cut, the more you’ll need to reinforce, which raises cost and complexity.
- Consider Future Expansion – If you might add more containers later, leave space for connectors and align utilities accordingly.
- Use a Dedicated Contractor – Not every general contractor is familiar with steel box construction. Look for firms with container‑conversion experience.
7. Frequently Asked Questions
Q1: Do I need a special permit to convert a shipping container?
Yes. Most municipalities treat a container conversion as a conventional building project, which means you’ll need building permits, zoning approval, and possibly a variance if the structure doesn’t meet standard setbacks. Always start with your local planning department.
Q2: How long does the container itself last?
Steel containers are designed for a 20‑year service life in harsh marine environments. With proper maintenance—periodic repainting, rust treatment, and interior climate control—a converted container can easily exceed 50 years.
Q3: Is a container safe in earthquakes or severe weather?
When properly anchored to a foundation and reinforced around cut openings, containers perform well in seismic zones. For hurricane‑prone areas, add extra bracing and consider a steel frame extension for wind resistance.
Q4: Can I install solar panels on a container roof?
Absolutely. The flat roof is perfect for mounting solar racking systems. Just ensure the roof can bear the added weight (most containers are rated for ~2,000 lb).
Q5: What’s the best insulation method for a container?
Spray‑foam (closed‑cell) offers the highest R‑value per inch, provides an air barrier, and helps prevent condensation. If budget is tight, rigid foam board combined with batt insulation can also work, but you’ll need a vapor barrier.
Q6: How do I deal with condensation inside the container?
Good insulation, a vapor barrier, and adequate ventilation (e.g., an exhaust fan or HRV system) are essential. Avoid using only interior moisture‑producing appliances without proper exhaust.
Q7: Can I rent out a converted container as a short‑term rental?
Yes—many entrepreneurs list container homes on platforms like Airbnb. Just verify local short‑term rental regulations and ensure you have the necessary insurance coverage.
Q8: How much can I expect to resale a container conversion?
Resale value depends on location, finish quality, and market demand. In many urban markets, a well‑finished container home can fetch 80‑95 % of the cost of a comparable conventional home.
8. Final Thoughts – Your Steel‑Box Journey Starts Today
You now have a roadmap, cost guide, timeline, and checklist that cover every facet of container conversion. The key to success is planning ahead—understand local regulations, secure a realistic budget, and work with professionals who have experience in steel construction.
When the first steel panel rolls onto your lot, you’ll feel the excitement of turning a simple shipping box into a personalized sanctuary. Whether you’re chasing a minimalist tiny home, a sleek boutique studio, or an eco‑friendly office, the container conversion process offers a fast, sustainable, and surprisingly adaptable path to your dream space.
Ready to start? Grab that spreadsheet, schedule a meeting with your local planning office, and begin sourcing a container. Your future steel‑box haven is just a few cuts and bolts away. Happy building!