Shipping Container Conversion: A Complete Guide for DIY Builders
If you’ve ever imagined turning a steel box into a cozy tiny home, an office, or a pop‑up café, you’re in the right place. This guide walks you through every step of a shipping‑container conversion—budgeting, planning, construction, and finishing touches—so you can bring your vision to life with confidence.
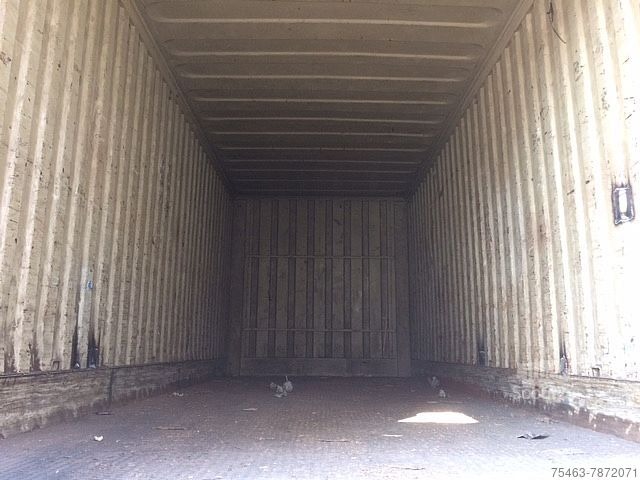
Why Choose a Shipping Container?
| Benefit | What It Means for You |
|---|---|
| Durability | Built to withstand harsh ocean conditions, containers are made of C‑rated steel that resists corrosion and structural fatigue. |
| Portability | Once modified, a container can be moved with a crane or flat‑bed truck, giving you flexibility if you need to relocate. |
| Cost‑Effective | New containers start around $2,500–$4,000, while used units can be bought for $1,200–$2,500, far cheaper than traditional construction square footage. |
| Eco‑Friendly | Repurposing a container keeps it out of the scrap pile and reduces the demand for new building materials. |
| Modular Design | You can stack or join multiple units to create larger spaces: two 40‑ft containers side‑by‑side become an 80‑ft “house.” |
These advantages make containers a popular choice for tiny‑home enthusiasts, entrepreneurs, and even municipalities looking for rapid, affordable shelter solutions.
Step‑by‑Step Roadmap
Below is the logical flow you’ll follow, from concept to completion.
| Phase | Key Tasks | Typical Timeframe |
|---|---|---|
| 1. Concept & Feasibility | • Define purpose (home, office, studio) • Check local zoning & building codes • Choose container size (20‑ft vs. 40‑ft) | 1–2 weeks |
| 2. Budget & Financing | • Draft cost breakdown (see Cost Table) • Secure funding (personal, loan, crowdfunding) | 2–3 weeks |
| 3. Design & Permitting | • Sketch floor plan (software or hand‑drawn) • Hire architect or use DIY design kits • Submit plans for permits | 3–6 weeks |
| 4. Procurement | • Purchase container (new or used) • Order insulation, windows, doors, interior finishes | 1–2 weeks |
| 5. Site Preparation | • Level foundation (concrete slab, piers, or steel frame) • Set up utilities (water, electricity, sewage) | 2–4 weeks |
| 6. Structural Modifications | • Cut openings for doors, windows, vents • Reinforce cuts with steel plates • Install roof hatches & skylights | 3–5 weeks |
| 7. Systems Installation | • Insulation (spray foam, blanket, or panel) • Electrical wiring & lighting • Plumbing & HVAC | 4–6 weeks |
| 8. Interior Finishing | • Frame interior walls (if needed) • Apply drywall, paneling, or wood cladding • Paint, flooring, cabinetry | 3–5 weeks |
| 9. Final Inspection & Move‑In | • Schedule code inspection • Address any punch‑list items • Furnish & personalize | 1–2 weeks |
Total estimated timeline: 4–6 months, depending on project complexity and permit turnaround.
Detailed Cost Breakdown
Tip: Prices vary by region. Use this table as a baseline and adjust for local labor rates and material costs.
| Item | Average Cost (USD) | Notes |
|---|---|---|
| Container (40‑ft, used, good condition) | $2,500 – $3,500 | Includes delivery within 100 mi |
| Structural modifications (cutting, welding, reinforcement) | $1,200 – $2,500 | Dependent on number/size of openings |
| Insulation (spray foam, ~2,500 sf) | $2,000 – $3,000 | Higher R‑value, reduces condensation |
| Windows & Doors (custom sizes) | $1,500 – $2,500 | Double‑glazed windows recommended |
| Electrical (wiring, panel, fixtures) | $1,200 – $2,000 | Include conduit and GFCI breakers |
| Plumbing (pipes, fixtures, water heater) | $1,000 – $1,800 | For bathroom/kitchen setups |
| HVAC (mini‑split system) | $1,200 – $2,200 | Efficient for small volumes |
| Interior finishes (drywall, flooring, cabinetry) | $2,500 – $4,500 | Choose durable, moisture‑resistant options |
| Foundation (concrete slab 8×20 ft) | $1,000 – $1,500 | Simple slab; piers may be cheaper |
| Permits & Inspection Fees | $300 – $800 | Varies by municipality |
| Contingency (10 % of total) | $1,200 – $2,000 | Unexpected expenses |
| TOTAL (approx.) | $15,200 – $27,300 | For a fully finished 40‑ft container home |
Design Essentials You Can’t Skip
1. Insulation & Moisture Control
- Why: Steel conducts heat and can develop condensation.
- Options:
- Closed‑cell spray foam – Highest R‑value, also seals gaps.
- Rigid foam board – Cost‑effective, must be covered with interior paneling.
- Blanket insulation – Easy DIY, but lower R‑value; pair with vapor barrier.
2. Ventilation & Air Quality
- Install at least two operable windows opposite each other for cross‑ventilation.
- Add roof vents or a small exhaust fan in the kitchen/bathroom area.
3. Structural Reinforcement
- Whenever you cut a large opening (e.g., a 4‑ft door), reinforce the surrounding steel with 12‑gauge steel plates welded on both sides.
- Use corner brackets to maintain load‑bearing integrity.
4. Electrical Planning
- Map out a single‑phase 120 V system; keep all wiring in conduit to meet code.
- Include LED lighting to reduce heat output and energy consumption.
5. Plumbing Layout
- Keep water lines close to the container’s exterior walls to minimize drilling and preserve structural strength.
- Consider a compact tankless water heater to save space and energy.
6. Interior Layout Tips
| Space | Ideal Solution |
|---|---|
| Living area | Open‑plan with built‑in sofa/bench that doubles as storage |
| Kitchen | Compact L‑shaped layout with a two‑burner stove, mini‑fridge, and pull‑out pantry |
| Bathroom | Wet‑room concept (shower + sink) with wall‑mounted toilet to maximize floor space |
| Bedroom | Lofted sleeping platform (if ceiling height allows) to free up floor area |
Common Pitfalls & How to Avoid Them
| Pitfall | Impact | Prevention |
|---|---|---|
| Under‑estimating weight | Overloads foundation, causing sagging. | Verify weight of container + finishes; design foundation to support at least 5,000 lb. |
| Skipping vapor barrier | Leads to rust and interior mold. | Install a continuous vapor barrier between insulation and interior walls. |
| Improper permit timing | Delays project; may require costly rework. | Submit full plans to the building department early; check for any special requirements for “modular” structures. |
| DIY electrical without certification | Safety hazards, failed inspection. | Hire a licensed electrician for final connections and inspection. |
| Poorly sealed openings | Water leaks, energy loss. | Use marine‑grade sealants and flashings around all cuts. |
Frequently Asked Questions
Q1: Do I need a special foundation for a container?
Yes. While containers are strong, they’re heavy. A concrete slab of at least 4‑in thickness or a series of concrete piers can safely distribute the load. If you’re on a sloped site, a retaining wall may be required.
Q2: Can I stack two containers for a two‑story home?
Absolutely. Stacking is common, but you must reinforce the connection points with welded plates and verify that the foundation can support the combined weight (roughly 20,000 lb for two 40‑ft units).
Q3: How do I prevent condensation inside the container?
Install high‑R‑value insulation, a vapor barrier, and ensure proper ventilation. A dehumidifier can also help in humid climates.
Q4: Are shipping containers considered “modular” by code?
In many jurisdictions, containers fall under the “modular building” category, which can simplify permitting. However, each city has its own definition, so check with your local building department.
Q5: What’s the best way to cut steel safely?
Use an abrasive cutting wheel on a sturdy angle grinder, wear eye protection, gloves, and a respirator. For larger openings, a plasma cutter provides cleaner cuts. Always have a qualified welder perform the reinforcement afterward.
Q6: Can I install solar panels on the roof?
Yes. The flat steel roof is ideal for mounting solar racking systems. Ensure the roof can handle the extra load (typically 10–15 lb/ft²) and that wiring complies with electrical codes.
Q7: How long does a conversion typically last before major renovation?
If built to code and maintained properly, a container home can last 30–50 years—comparable to conventional construction. Regularly check for rust, especially at cut edges.
Quick Checklist Before You Start
- Verify zoning, setbacks, and building codes.
- Secure a realistic budget with a 10 % contingency.
- Choose container size and condition (new vs. used).
- Draft a floor plan and obtain professional design review.
- Order all materials (insulation, windows, fixtures) before site work begins.
- Arrange for a concrete slab or steel frame foundation.
- Hire licensed electricians and plumbers for rough‑in work.
- Schedule inspections at each major phase (structural, electrical, final).
- Document the build with photos—great for future resale and troubleshooting!
Final Thoughts
Converting a shipping container is a rewarding blend of engineering, design, and hands‑on craftsmanship. By following the systematic approach outlined above—planning carefully, budgeting realistically, respecting local regulations, and paying close attention to insulation and moisture control—you’ll turn a steel box into a functional, stylish space that stands the test of time.
Ready to get started? Grab a coffee, sketch your dream layout, and start researching local suppliers. The journey from “raw container” to “your new home or studio” begins with a single, purposeful step.
Happy building!