The Ultimate Guide to Converting Shipping Containers into Livable Spaces
If you’ve ever walked past a row of rust‑stained steel boxes on a dock and imagined a cozy studio, a pop‑up café, or even a full‑size home, you’re not alone. Converting shipping containers—often called “container architecture”—has exploded from a niche, industrial‑design fad into a mainstream building solution. In this guide, you’ll learn everything you need to know to turn a simple metal box into a functional, stylish, and sustainable space.
1. Why Choose a Container Conversion?
Before you dive into the nuts and bolts, ask yourself: what problem are you trying to solve? If you answer “affordable, fast‑track construction with a distinctive aesthetic,” then a container conversion could be the perfect match.
| Benefit | What It Means for You |
|---|---|
| Speed | A typical 40‑ft container can be delivered, modified, and installed in 4‑8 weeks, compared with 6‑12 months for conventional builds. |
| Cost‑Effectiveness | Raw containers range from $2,000–$4,500 (used) to $6,000–$10,000 (new). When you factor in labor, insulation, and interior finishes, total project costs often stay 20‑30 % below traditional construction. |
| Portability | Once finished, you can relocate the structure (subject to local regulations) using a crane or flat‑bed truck. |
| Durability | Made from C‑rated steel, containers resist corrosion, pests, and fire better than many wood‑frame houses. |
| Sustainability | Repurposing a container keeps it out of landfills and reduces the demand for new building materials, cutting your carbon footprint. |
If those points line up with your goals, keep reading—you’ll discover how to translate this potential into a real‑world project.
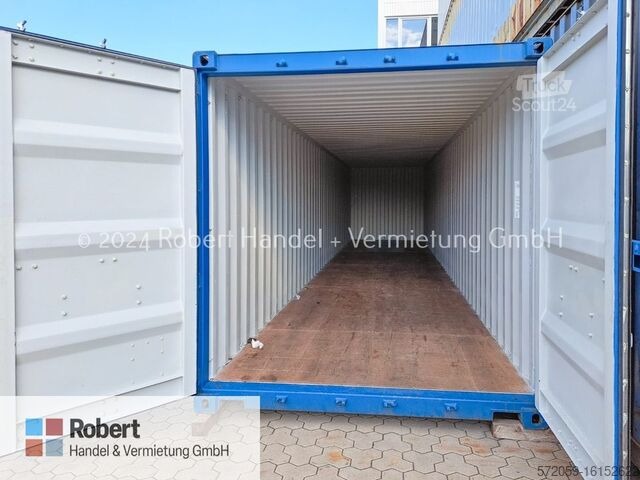
2. Choosing the Right Container
Containers come in a few standard sizes, each with its own advantages. Below is a quick‑reference table to help you decide which box best suits your vision.
| Size | External Dimensions | Internal Volume | Typical Uses |
|---|---|---|---|
| 20‑ft Standard | 20′ × 8′ × 8′ 6″ (L × W × H) | ~1,170 ft³ | Tiny homes, accessory units, pop‑up shops |
| 40‑ft Standard | 40′ × 8′ × 8′ 6″ | ~2,390 ft³ | Larger residences, offices, classrooms |
| 40‑ft High‑Cube | 40′ × 8′ × 9′ 6″ | ~2,700 ft³ | Projects that require extra headroom (lofts, studios) |
| 45‑ft High‑Cube | 45′ × 8′ × 9′ 6″ | ~3,045 ft³ | Small multi‑room homes or boutique hotels |
Key considerations when picking a container:
- Floor plan flexibility – Larger containers give you more square footage, but you may need to splice two or more together for “open‑plan” designs.
- Transport logistics – 40‑ft units require a larger flat‑bed trailer and may be subject to stricter road‑size restrictions.
- Budget – Used 20‑ft containers are the cheapest entry point, while new high‑cube units cost more but offer a ready‑made “taller” feel.
3. From Box to Building: The Core Conversion Steps
Below is a checklist that walks you through the conversion process. Treat each bullet as a milestone; crossing them off one by one will keep the project on schedule.
- Site Assessment & Permits
- Verify zoning allowances for accessory dwelling units (ADUs), commercial use, or temporary structures.
- Obtain building permits, electrical permits, and, if necessary, a variance for the container’s footprint.
- Container Procurement
- Source a reputable supplier; ask for a Container Condition Report that lists dents, rust, and any structural repairs needed.
- Structural Modifications
- Cutting openings – doors, windows, and skylights require steel reinforcement plates and welding.
- Reinforcement – If you plan to stack containers, add shear plates and gusset brackets at the contact points.
- Insulation & Moisture Control
- Choose between spray foam (high R‑value, air‑tight), mineral wool (fire‑resistant), or rigid board (cost‑effective).
- Install a vapor barrier on the interior side of the steel to prevent condensation.
- Electrical, Plumbing, & HVAC
- Run conduit through pre‑drilled sleeves; make sure all penetrations are sealed with fire‑rated grommets.
- For heating and cooling, consider a mini‑split system (compact, energy‑efficient) or a hydronic radiant floor for the colder months.
- Interior Finishing
- Frame interior walls with lightweight steel studs or timber, then apply drywall, plywood, or reclaimed wood panels.
- Choose flooring that tolerates temperature fluctuations—engineered wood, polished concrete, or luxury vinyl tile (LVT).
- Exterior Cladding (Optional)
- While the corrugated steel can stand alone as an aesthetic statement, many owners add metal siding, fiber‑cement panels, or wood cladding to soften the look.
- Final Inspection & Certification
- Schedule a comprehensive inspection to verify compliance with local codes.
- Obtain an occupancy certificate before moving in or opening for business.
4. Cost Breakdown (Typical Ranges)
Understanding where the money goes will help you manage expectations and avoid budget overruns. The table below reflects a mid‑range 40‑ft high‑cube conversion intended for a two‑bedroom tiny home. Prices are in U.S. dollars and vary with location and material choice.
| Category | Cost Range | Notes |
|---|---|---|
| Container purchase (used) | $3,500 – $5,000 | Includes delivery to site |
| Structural modifications (cuts, reinforcements) | $2,000 – $4,000 | Welding, steel plates, labor |
| Insulation & vapor barrier | $1,500 – $3,000 | Spray foam on high end |
| Electrical & lighting | $2,500 – $4,500 | Wiring, panels, fixtures |
| Plumbing & bathroom fixtures | $3,000 – $5,500 | Tankless water heater, low‑flow fixtures |
| HVAC (mini‑split) | $2,000 – $3,500 | Includes refrigerant line set |
| Interior finishes (drywall, flooring, cabinets) | $5,000 – $9,000 | Material quality drives cost |
| Exterior cladding (optional) | $1,500 – $3,000 | Wood, metal panels, etc. |
| Permits & inspections | $800 – $1,500 | Varies by municipality |
| Total Approximate | $22,800 – $39,000 | ≈ $150–$250 / ft² |
Tip: Always allocate 10‑15 % of the total budget for unforeseen expenses—steel fatigue, additional reinforcement, or design changes that arise during construction.
5. Design Inspiration: 5 Creative Uses for Converted Containers
- Micro‑Home Retreat – A single 40‑ft high‑cube transformed into a loft‑style studio with a mezzanine sleeping area, kitchenette, and full bathroom.
- Pop‑Up Coffee Shop – Two side‑by‑side 20‑ft containers, each housing a barista station and a small seating nook, painted with a bold brand mural.
- Mobile Workshop – A 20‑ft unit equipped with heavy‑duty shelving, a three‑phase power outlet, and a roll‑up door for easy equipment loading.
- Rural Guesthouse – A pair of stacked 40‑ft containers forming a two‑story cabin with an outdoor balcony, perfect for agritourism.
- Urban Art Gallery – A 45‑ft high‑cube with floor‑to‑ceiling glass panels, climate‑controlled lighting, and movable partitions for rotating exhibits.
6. Common Pitfalls & How to Avoid Them
| Pitfall | Why It Happens | Prevention Strategy |
|---|---|---|
| Insufficient insulation | Steel conducts heat; without proper R‑value the interior becomes uncomfortable. | Conduct a thermal bridge analysis and select high‑R spray foam or insulated panels. |
| Corrosion after cutting | Cutting creates exposed steel edges that rust if not protected. | Apply epoxy primer and corrosion‑resistant paint to all cut edges. |
| Underestimating structural load | Adding heavy interior walls or mezzanines can exceed the container’s design capacity. | Consult a structural engineer before adding permanent load‑bearing elements. |
| Permit delays | Some jurisdictions lack clear guidelines for container buildings. | Meet with the local building department early; bring sample plans and a code‑compliance checklist. |
| Moisture buildup | Condensation forms when cold exterior steel meets warm interior air. | Install a continuous vapor barrier and include proper ventilation or dehumidification. |
7. Quick‑Start Checklist (For the Busy Planner)
- Research local zoning and building codes.
- Secure financing or budget allocation (including contingency).
- Locate a reputable container supplier and request a condition report.
- Hire a certified contractor experienced in steel structures.
- Finalize architectural drawings (including structural reinforcement details).
- Obtain all required permits.
- Order insulation and interior finish materials.
- Schedule site delivery and crane placement.
- Conduct a pre‑installation safety briefing.
- Perform a final walk‑through before occupancy.
8. Frequently Asked Questions
Q1: How long does a container conversion typically take?
Answer: For a single‑unit residential conversion, the timeline averages 4–8 weeks from container delivery to final inspection, assuming permits are secured early.
Q2: Are containers safe in earthquakes?
Answer: Yes, C‑rated steel frames are inherently ductile and can absorb seismic forces. However, you must anchor the unit to a concrete foundation and follow local seismic design guidelines.
Q3: Can I stack containers on top of each other?
Answer: Absolutely. Stacking is common for multi‑story homes. You’ll need reinforced corner plates, proper foundation design, and a structural engineer’s sign‑off.
Q4: What is the best insulation for a container home in a cold climate?
Answer: Closed‑cell spray foam provides excellent R‑value (≈ 6‑7 per inch) and creates an air‑tight envelope, making it ideal for colder regions.
Q5: Do I need a foundation?
Answer: Most municipalities require a permanent foundation (concrete slab, pier, or pad) for permanent structures. For temporary or “pop‑up” installations, a steel frame on a leveled pad may be acceptable.
Q6: How do I handle water runoff from the roof?
Answer: Install gutter systems and direct downspouts to a drainage trench or rainwater harvesting barrel. Remember to seal all roof penetrations.
Q7: Can I add solar panels?
Answer: Yes. The flat roof of a container is a perfect platform for photovoltaic (PV) panels. Make sure the roof’s load‑bearing capacity can support the additional weight.
9. Final Thoughts: Your Next Step
Converted containers offer a unique blend of speed, affordability, and design flexibility. By following the systematic approach outlined above—select the right box, plan the modifications, manage the budget, and respect local codes—you’ll transform a steel box into a space that reflects your personality and meets your functional needs.
So, what are you waiting for? Sketch out your vision, talk to a local supplier, and take the first step toward a project that’s as bold as it is practical. Your future container conversion is just a few decisions away.
Ready to start? Contact a certified container‑conversion specialist in your region today and turn that rusted rectangle into a masterpiece of modern living.